Flutter For Beginners#5- Flutter Routing and Navigation

👩💻📚🔍 Hi there! I'm a passionate software developer, constantly exploring the ever-evolving world of technology. With a voracious appetite for knowledge, I'm always diving into books and articles, seeking new insights and expanding my horizons. 💡✨ Curiosity is my driving force, and I'm on a never-ending quest to unravel the mysteries of the digital realm. Join me on this exciting journey as we navigate the realms of code and reach new heights together! 🚀🌟
Navigation and routing are some of the core concepts of all mobile application, which allows the user to move between different pages. We know that every mobile application contains several screens for displaying different types of information. in Flutter, the screens and pages are known as routes, and these routes are just a widget.
There are multiple options for routing, Some create a lot of clutter, others cannot facilitate passing data between routes, and yet others require that you set up a third-party library. The options that you are going to learn about in this tutorial are the best from both worlds. I will also introduce you to some of the most used Navigation Widgets in Flutter.
Okay lets get to them!
Anonymous Navigation
Step 1: First, you need to create two routes.
Step 2: Then, navigate to one route from another route by using the Navigator.push() method.
Step 3: Finally, navigate to the first route by using the Navigator.pop() method.
see example below to understand the navigation between two routes
Create two routes
Here, we are going to create two routes for navigation
When we tap the IconButton on the first page, it will navigate to the second page. Again, when we tap the IconButton on the second page, it will return to the first page. The below code snippet creates two routes in the Flutter application.
The below code snippet creates two routes in the Flutter application.
import "package:flutter/material.dart";

void main() {
  runApp(MyApp());
}

class MyApp extends StatelessWidget {
  const MyApp({Key? key}) : super(key: key);

  @override
  Widget build(BuildContext context) {
    return MaterialApp(
      title: 'Flutter Navigation',
      home: FirstRoute(),
    );
  }
}

class FirstRoute extends StatelessWidget {
  @override
  Widget build(BuildContext context) {
    return Scaffold(
      appBar: AppBar(
        title: Text('First Route'),
      ),
      body: Center(
        child: IconButton(
          iconSize: 60.0,
          icon: Icon(
            Icons.arrow_forward,
          ),
          onPressed: () {
            // Navigate to second route when tapped.
            Navigator.push(
              context,
              MaterialPageRoute(
                builder: (context) => SecondRoute(),
              ),
            );
          },
        ),
      ),
    );
  }
}

class SecondRoute extends StatelessWidget {
  @override
  Widget build(BuildContext context) {
    return Scaffold(
      appBar: AppBar(
        title: Text("Second Route"),
      ),
      body: Center(
        child: IconButton(
          iconSize: 60.0,
          icon: Icon(
            Icons.arrow_back,
          ),
          onPressed: () {
            // Navigate back to first route when tapped.
            Navigator.pop(context);
          },
        ),
      ),
    );
  }
}
Navigate to the second route using Navigator.push() method
The Navigator.push() method is used to navigate/switch to a new route/page/screen. Here, the push() method adds a page/route on the stack and then manage it by using the Navigator. We use MaterialPageRoute class that allows transition between the routes using a platform-specific animation. The below code explain the use of the Navigator.push() method and Navigator.pop() method.
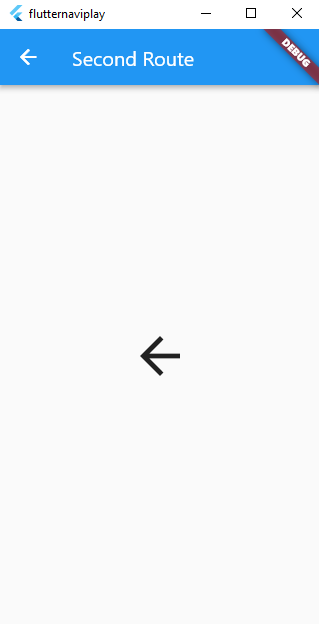
Returning to the first route using Navigator.pop() method looking at the above code snippet,we updated the onPressed property in the Second Route Widget and used Navigator.pop() method to close the second route and return to the first route. The pop() method allows us to remove the current route from the stack, which is managed by the Navigator.
When You run the app, you will get the following in your emulator
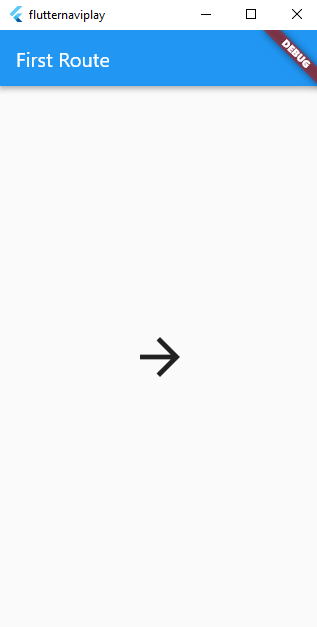
Click the forward arrow button and you will navigate to a second screen as below image. Next, when you click on the backward arrow button, you will return to the first page.
While navigation without using named routes is OK for smaller projects, in more complex apps it adds code duplication.
Named Navigation
The better way to navigate
We can work with named routes by using the Navigator.pushNamed() function. This function takes two required arguments (build context and string) and one optional argument. Also, we know about the MaterialPageRoute, which is responsible for page transition. If we do not use this, then it is difficult to change the page.
The following steps are necessary, which demonstrate how to use named routes.
Step 1: First, we need to create two screens. The following code creates the two screens in our app.
import "package:flutter/material.dart";

void main() {
  runApp(MyApp());
}

class MyApp extends StatelessWidget {
  const MyApp({Key? key}) : super(key: key);

  @override
  Widget build(BuildContext context) {
    return MaterialApp(
      title: 'Flutter Navigation',
      home: HomeScreen(),
    );
  }
}

class HomeScreen extends StatelessWidget {
  @override
  Widget build(BuildContext context) {
    return Scaffold(
      appBar: AppBar(
        title: Text('Home Screen'),
      ),
      body: Center(
        child: ElevatedButton(
          child: Icon(Icons.arrow_forward, size: 80.0),
          style: ElevatedButton.styleFrom(primary: Colors.amber[600]),
          onPressed: () {
            //
          },
        ),
      ),
    );
  }
}

class SecondScreen extends StatelessWidget {
  @override
  Widget build(BuildContext context) {
    return Scaffold(
      appBar: AppBar(
        title: Text("Second Screen"),
      ),
      body: Center(
        child: ElevatedButton(
          child: Icon(Icons.arrow_back, size: 80.0),
          style: ElevatedButton.styleFrom(primary: Colors.amber[900]),
          onPressed: () {
            //
          },
        ),
      ),
    );
  }
}
Step 2: Define the routes.
In this step, we have to define the routes. The MaterialApp constructor is responsible for defining the initial route and other routes themselves.
The following code explains it more clearly.
import "package:flutter/material.dart";

void main() {
  runApp(MyApp());
}

class MyApp extends StatelessWidget {
  const MyApp({Key? key}) : super(key: key);

  @override
  Widget build(BuildContext context) {
    return MaterialApp(
      theme: ThemeData(
        primaryColor: Colors.black,
      ),
      title: 'Flutter Navigation',
      initialRoute: '/',
      routes: {
        '/': (context) => HomeScreen(),
        'second':(context) => SecondScreen(),
      },
    );
  }
}

class HomeScreen extends StatelessWidget {
  @override
  Widget build(BuildContext context) {
    return Scaffold(
      appBar: AppBar(
        title: Text('Home Screen'),
      ),
      body: Center(
        child: ElevatedButton(
          child: Icon(Icons.arrow_forward, size: 80.0),
          style: ElevatedButton.styleFrom(primary: Colors.amber[600]),
          onPressed: () {
            //
          },
        ),
      ),
    );
  }
}

class SecondScreen extends StatelessWidget {
  @override
  Widget build(BuildContext context) {
    return Scaffold(
      appBar: AppBar(
        title: Text("Second Screen"),
      ),
      body: Center(
        child: ElevatedButton(
          child: Icon(Icons.arrow_back, size: 80.0),
          style: ElevatedButton.styleFrom(primary: Colors.amber[900]),
          onPressed: () {
            //
          },
        ),
      ),
    );
  }
}
Step 3: Navigate to the second screen using the Navigator.pushNamed() function.
In this step, we need to call Navigator.pushNamed() method for navigation. For this, we need to update an onPressed() callback in the build method of HomeScreen like below code snippets.
import "package:flutter/material.dart";

void main() {
  runApp(MyApp());
}

class MyApp extends StatelessWidget {
  const MyApp({Key? key}) : super(key: key);

  @override
  Widget build(BuildContext context) {
    return MaterialApp(
      theme: ThemeData(
        primaryColor: Colors.black,
      ),
      title: 'Flutter Navigation',
      initialRoute: '/',
      routes: {
        '/': (context) => HomeScreen(),
        'second':(context) => SecondScreen(),
      },
    );
  }
}

class HomeScreen extends StatelessWidget {
  @override
  Widget build(BuildContext context) {
    return Scaffold(
      appBar: AppBar(
        title: Text('Home Screen'),
      ),
      body: Center(
        child: ElevatedButton(
          child: Icon(Icons.arrow_forward, size: 80.0),
          style: ElevatedButton.styleFrom(primary: Colors.amber[600]),
          onPressed: () {
            Navigator.pushNamed(context, '/second');
          },
        ),
      ),
    );
  }
}

class SecondScreen extends StatelessWidget {
  @override
  Widget build(BuildContext context) {
    return Scaffold(
      appBar: AppBar(
        title: Text("Second Screen"),
      ),
      body: Center(
        child: ElevatedButton(
          child: Icon(Icons.arrow_back, size: 80.0),
          style: ElevatedButton.styleFrom(primary: Colors.amber[900]),
          onPressed: () {
            //
          },
        ),
      ),
    );
  }
}
Step 4: Use a Navigator.pop() function to return to the first screen.
It is the final step, where we will use Navigator.pop() method to return on the first screen. Let us see the full code of the above explanation in the Flutter project and run it in the emulator to get the output
import "package:flutter/material.dart";

void main() {
  runApp(MyApp());
}

class MyApp extends StatelessWidget {
  const MyApp({Key? key}) : super(key: key);

  @override
  Widget build(BuildContext context) {
    return MaterialApp(
      theme: ThemeData(
        primaryColor: Colors.black,
      ),
      title: 'Flutter Navigation',
      initialRoute: '/',
      routes: {
        '/': (context) => HomeScreen(),
        '/second':(context) => SecondScreen(),
      },
      // home: HomeScreen(),
    );
  }
}

class HomeScreen extends StatelessWidget {
  @override
  Widget build(BuildContext context) {
    return Scaffold(
      appBar: AppBar(
        title: Text('Home Screen'),
      ),
      body: Center(
        child: ElevatedButton(
          child: Icon(Icons.arrow_forward, size: 80.0),
          style: ElevatedButton.styleFrom(primary: Colors.amber[600]),
          onPressed: () {
            Navigator.pushNamed(context, '/second');
          },
        ),
      ),
    );
  }
}

class SecondScreen extends StatelessWidget {
  @override
  Widget build(BuildContext context) {
    return Scaffold(
      appBar: AppBar(
        title: Text("Second Screen"),
      ),
      body: Center(
        child: ElevatedButton(
          child: Icon(Icons.arrow_back, size: 80.0),
          style: ElevatedButton.styleFrom(primary: Colors.amber[900]),
          onPressed: () {
          Navigator.pop(context);
          },
        ),
      ),
    );
  }
}
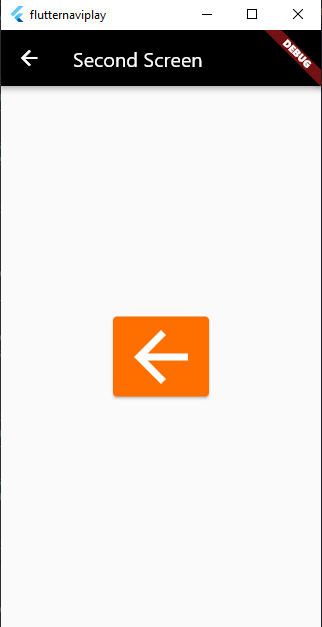
Output When run on An Emulator
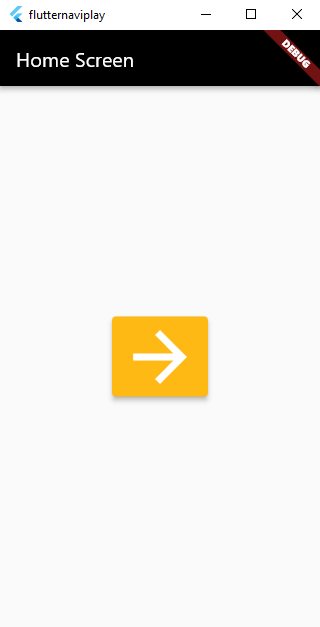
Click the forward arrow button, and you will navigate to a second screen as below image. Next, when you click on the backward button, it will return to the Home Screen as Above image.
Sometimes, a Navigator isn’t the best choice for navigating between parts of your app. One significant consideration with it is that there is no user-facing interface to it, it’s entirely programmatic. Fortunately, Flutter offers a few visual navigation widgets too
BottomNavigationBar
This widget provides a bar at the bottom of the screen with icons and/or text that the user can click to move between parts of your app.In fact, this widget doesn’t really do any navigation itself, making its name a bit of a misnomer. The navigation part is up to your code, and really you don’t have to use it for navigation even! However, it normally is used to navigate, after a fashion, here’s one way to do so
import "package:flutter/material.dart";

void main() {
  runApp(MyApp());
}

class MyApp extends StatefulWidget {
  const MyApp({Key? key}) : super(key: key);

  @override
  _MyAppState createState() => _MyAppState();
}

class _MyAppState extends State<MyApp> {
  var _currentPage = 0;

  var _pages = [
    Text("Page 1 - Announcements", style: TextStyle(color: Colors.white),),
    Text("Page 2 - Birthdays",style: TextStyle(color: Colors.white)),
    Text("Page 3 - Data",style: TextStyle(color: Colors.white))
  ];

  @override
  Widget build(BuildContext context) {
    return MaterialApp(
      title: 'Testing the BottomBar',
      home: Scaffold(
        backgroundColor: Colors.black,
        appBar: AppBar(
          backgroundColor: Colors.black,
          title: Text('Testing Bar'),
        ),
        body: Center(child: _pages.elementAt(_currentPage)),
        bottomNavigationBar: BottomNavigationBar(
          backgroundColor: Colors.black,
          unselectedItemColor: Colors.grey,
          elevation: 0.0,
            items: [
              BottomNavigationBarItem(
                icon: Icon(Icons.announcement_outlined),
                label: "Announcements",
              ),
              BottomNavigationBarItem(
                icon: Icon(Icons.cake),
                label: "Birthdays",
              ),
              BottomNavigationBarItem(
                icon: Icon(Icons.cloud),
                label: "Data",
              ),
            ],
            currentIndex: _currentPage,
            fixedColor: Colors.cyan,
            onTap: (int index) {
              setState(() {
                _currentPage = index;
              });
            }),
      ),
    );
  }
}
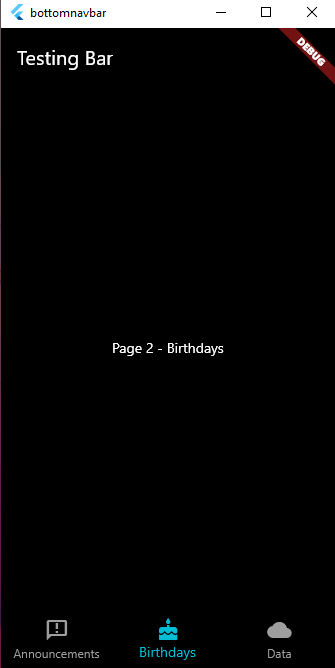
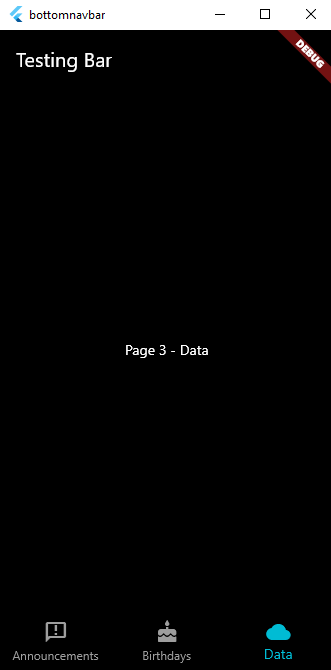
outputs in an emulator
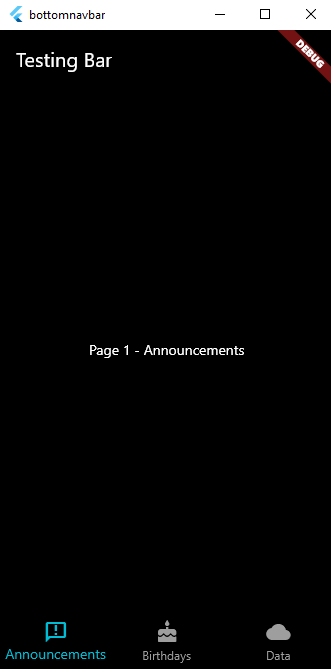
Here, we start by creating a stateful widget. This is necessary because the top-level widget is built once unless it has state that changes, which is precisely what we need to happen when the user clicks one of the items on the bar. Hence, we have to make this a stateful widget to provide that state.
Getting into the State widget class, the state for this widget is the private _currentPage variable. The value of this is fed to the elementAt() method of the private _pages list. This determines what item from the list is the contents inside the Center widget (which could be an entire widget tree rather than a single Textwidget).
The bottomNavigationBar property of the Scaffold widget takes as its value an instance of BottomNavigationBar, which has an items property. This property is a list of BottomNavigationBarItem widgets. Each of those can have an icon and a title as we seem fit.
Flutter comes with a collection of icons thanks to the Icons class, so we don’t even have to go digging around for graphics if we don’t want to!
And, when working in Android Studio, you’ll have code completion, so you don’t even have to remember or even look up the icons when you need them! The currentIndex property of the BottomNavigationBar tells us which of the items on the bar is currently selected, and the fixedColor property determines what color to make that selected item.Now, when the user taps one of the items, by default nothing will happen. To fix that, the onTap property is defined. This is a function that is passed the index of the tapped item. So, now we know what item from _pages we should display, but how does the value of _currentPage get updated? That’s where the call to the setState() method, supplied by virtue of this class extending the State class, comes into play. All we need to do is call this method and do the updates to the _currentPage variable in it. This triggers Flutter to rebuild the widget. Since _currentPage is different now, a different element from _pages will be displayed. The result for the user is that they appear to have navigated to a new page.
TabBar & TabViewBar
Another navigation element is the TabBar. A TabBarView is essentially a stack of screens (or views, if you will) where only one is visible at a time, and the user can move between them. The way one becomes visible is by user interaction with a TabBar. They can click the icon for one of the tabs or swipe between them.
Take a look at the example below
import 'package:flutter/material.dart';

void main() {
  runApp(MyApp());
}

class MyApp extends StatefulWidget {
  const MyApp({Key? key}) : super(key: key);

  @override
  _MyAppState createState() => _MyAppState();
}

class _MyAppState extends State<MyApp> {
  @override
  Widget build(BuildContext context) {
    return MaterialApp(
      home: DefaultTabController(
        initialIndex: 1,
        length: 4,
        child: Scaffold(
          appBar: AppBar(
            backgroundColor: Colors.black,
            title: Text('Black Wallpapers'),
            bottom: TabBar(
              tabs: [
                Tab(
                  icon: Icon(Icons.image_search_rounded),
                ),
                Tab(icon: Icon(Icons.local_fire_department_sharp)),
                Tab(
                  icon: Icon(Icons.show_chart_outlined),
                ),
                Tab(
                  icon: Icon(Icons.shuffle),
                ),
              ],
            ),
          ),
          body: TabBarView(
            children: [
              Center(
                child: Text("Categories of Images from source"),
              ),
              Center(
                child: Text("Latest images from source"),
              ),
              Center(
                child: Text("most popular Images"),
              ),
              Center(
                child: Text("shuffle Images from source"),
              )
            ],
          ),
        ),
      ),
    );
  }
}
output in an emulator
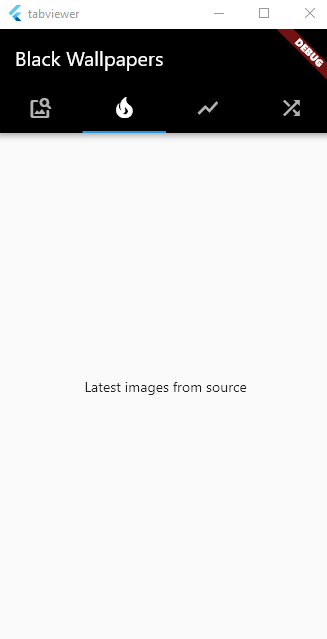
Behind the scenes, a TabController widget will be responsible for keeping track of what tab is current and the content of each. You can create one manually, but that requires extra work on your part, so most of the time you’ll just use the DefaultTabController widget as the value of the home property of a MaterialAppwidget, which takes care of all the details for you.
However, you do it, you have to tell the TabController how many tabs there are via the length property. After that, you need to describe each tab for the TabController, and that’s done by giving it an array of tabs where each item is a Tab widget. Here, we just specify an icon for each.Once the tabs themselves are defined, we then must tell the TabController what the content for each tab is, and that’s done by providing a TabBarView widget as the value of the body property. Each element in the children list can be as complex a widget tree as you need. Here, it’s just some Center widgets with Text widgets in them. With all of that done, the interaction of moving between the views is automatic from our perspective, and the user can navigate between them freely.
Phewwww, And these are what you need to know about Flutter Routing And Navigation.
Conclusion
In this aticle you learnt about Routing, Navigator, how to enable your app users effectively Navigate to different pages in your app, you also learnt about Navigation Widgtes like TabBarView and BottomNavigationBar, yes there are still others, but we will discuss those as we advance in this journey. In the next article we will be discussing about inputs in Flutter, how to take inputs for your app users efficiently And that's it for now, See you in the next article.


